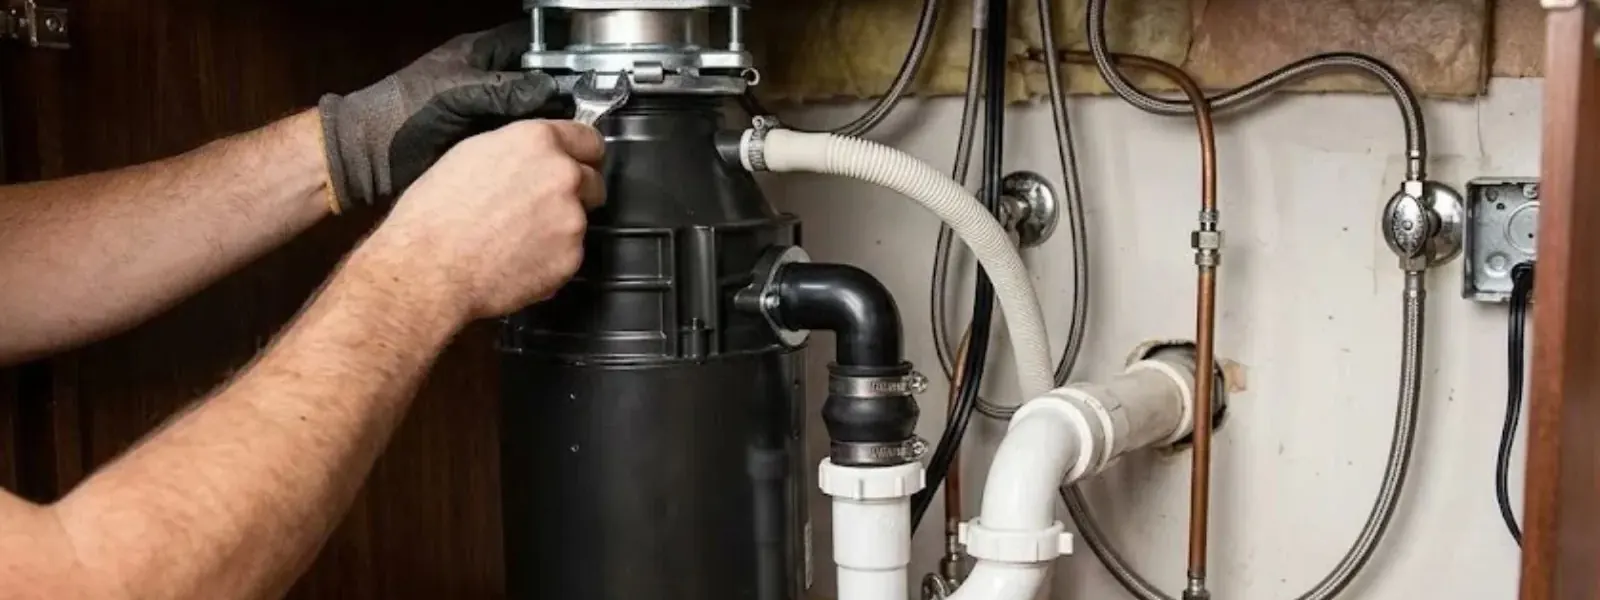
Here is the most common disposal story. A new unit goes in on Saturday, the dishwasher runs Sunday, and the cabinet floor is soaked by Monday. The dishwasher drain was blocked by a small plastic knockout plug the installer never removed.
That single detail is why this job deserves a proper walkthrough. The brand name InSinkErator is the one most Elmwood Park homeowners search for, and the steps here apply to most similar models. Read your own unit's instructions as well, because mounting hardware differs between lines.
Before you buy or unpack a unit
Pre-install checklist
- Check the sink. A standard kitchen sink drain opening works for most units. Stone, composite and fireclay sinks can need extra care, so read the instructions.
- Look under the cabinet. You need clearance for the unit and room for the trap and drain pipe. Measure before you shop.
- Find the electrical option. Locate a switched outlet under the sink or a switch and wiring box. This decides whether the unit plugs in or is wired in.
- Check the dishwasher. If a dishwasher drains through the disposal, note where its hose connects and what size it is.
- Match horsepower to habits. A bigger motor handles more, but no disposal likes stringy, fibrous or greasy scraps.
Mounting assemblies and what they mean for you
The assembly is the ring and flange hardware that holds the unit to the underside of the sink. Different families use different designs.
| Style | How it works | What to watch |
|---|---|---|
| Three-bolt | Screws pull a mounting ring and flange tight around the sink opening | Tighten evenly and in rotation to avoid a lopsided seal |
| Quick-lock | A twist-on design with a cam collar | Easy to fit, check that the ring is fully engaged |
| Replacement of a matching brand | Reuse the existing mounting ring when it fits | Check wear and cracks before reusing |
| Stainless or plastic flange | The part visible in the sink | Material affects finish more than function |
If the new unit shares the same mounting family as your old one, you may be able to swap only the body. If not, the whole assembly comes out.
Plumber's putty or gasket under the flange
Both seal the gap between the sink and the flange. Your unit's instructions decide which.
Plumber's putty
- Rolled into a rope and pressed under the flange rim
- Squeezes out as you tighten, wipe it away cleanly
- Can stain some stone and porous surfaces, so check first
- Works well on standard stainless sinks
Gasket or sealing ring
- Supplied with many modern units
- Cleaner to install, no oozing
- Needs a flat, undamaged sink opening
- Often the manufacturer's preferred seal
Do not stack both. Using putty plus a gasket where only one is called for can leave a gap that weeps slowly over weeks.
Not sure which hardware your sink needs?
Our licensed plumbers can bring the right mounting parts and set the unit, with the cost spelled out before work begins.
Putting it together, in the order that avoids mistakes
Turn off the power and clear the cabinet
Switch off the breaker or unplug the old unit. Place a bucket under the trap, disconnect the drain pipes and remove the old disposal.
Mount the flange
Seal the flange to the sink with putty or the supplied gasket, then attach the mounting ring and snug it evenly from underneath.
Knock out the dishwasher plug
If a dishwasher connects, find the knockout plug inside the unit's side port. Tap it out with a hammer and screwdriver, then fish it out of the grinding chamber. Skip this and the dishwasher will not drain.
Hang the disposal and align the outlet
Lift the body onto the mounting ring and rotate until the discharge points toward the trap. Connect the drain tube with its gasket and tighten the nuts.
Connect the dishwasher hose and test
Attach the hose with its clamp, restore power only after the plumbing is secure, run water and the unit, then check every joint for drips.
Plug-in or hardwired: where electricians come in
Some disposals ship with a power cord and plug into a switched outlet under the sink. Others are hardwired into a junction box on the unit. Both are common. If the wiring and the switch already exist where the old unit sat, swapping like for like is a modest job.
A new circuit, a new switch location or any work inside the panel belongs to a licensed electrician. Do not splice wires by guess or run extension cords under a wet cabinet. Outlets near sinks should be protected as required by code, and a plumber will tell you to bring in an electrician rather than improvise.
Water and electricity share the cabinet, so treat every step as if the power could be live until proven otherwise.
Mistakes that cause leaks and jams
Plug left in the dishwasher port
The dishwasher cannot drain and backs up into the unit or cabinet.
Uneven mounting screws
A flange pulled down on one side leaks at the sink rim.
Misaligned drain outlet
A crooked discharge strains the trap fittings and weeps at the joints.
Overtightened plastic nuts
Cracked slip nuts leak slowly and are hard to spot.
Wrong things down the drain
Grease, bones, fibrous peels and pasta swell or wrap around parts and cause clogs.
Run cold water before, during and for several seconds after grinding. Hot water melts grease, which then hardens farther down the line.
Disposal humming, jammed or leaking after install?
A quick diagnosis often saves a whole replacement. Our plumbers can reset, clear or swap the unit.
When to call a plumber instead of finishing the job
Stop if the sink opening is cracked, if the drain pipe behind the trap is corroded or if the cabinet has soft, stained wood. A slow-draining kitchen line is also a warning, because a disposal that sends more food into a partially blocked pipe will make the blockage worse. A garbage disposal visit includes checking the line downstream, not only the unit.
If you smell gas near the appliance, leave the building and call the gas utility and 911 from outside before doing anything else.
Disposals and drains in Elmwood Park homes
Elmwood Park is served by combined sewers, meaning storm water and household waste share the same pipe, owned and maintained by the Village. During heavy rain, water can push back up into basements. A disposal sends ground food into that same system, so grease and starchy scraps are better kept out of the drain altogether.
Many local homes were built decades ago. The CMAP housing snapshot puts the median build year at 1955, and older kitchen drains often include galvanized or cast iron sections that narrow inside. Roughly 35 percent of households rent, so check your lease before installing anything, and ask the owner about permission and wiring.
Before hiring anyone, check their State licence on the Illinois Department of Public Health lookup. Whether a disposal swap needs a permit is a call for the Village building department, because requirements differ by job. Our River Grove plumber page and service area list show where else we work.
Sources: Village of Elmwood Park flood-proofing and sewer information, MWRD flood resource guidance, CMAP housing snapshot, IDPH plumbing licence page
Garbage disposal installation questions
Many disposals come with a small plug blocking the dishwasher inlet. If you connect a dishwasher without knocking it out, the dishwasher cannot drain. Remove it and fish it out of the chamber.
Possibly, but check the manufacturer's instructions and sink material first. Some stone sinks need a different sealing approach or professional handling.
If an outlet or switch already exists, swapping a plug-in or hardwired unit may be straightforward. A new circuit, new switch or panel work needs a licensed electrician.
Turn it off and cut power at the breaker. Look underneath for a hex-shaped socket that lets you turn the grinder by hand with the tool in the box and clear a jam. Never put your hand in the chamber.
The Village's sewers are combined, with storm water and household waste in the same pipe. Heavy rain can cause backups, so keep grease, fats and fibrous scraps out of any drain, disposal or not.
Often. Older kitchen drains can be corroded or undersized, and the sink cabinet may need repair. A plumber can inspect before you commit to a new unit.
Standards and sources: Work in Illinois follows the Illinois Plumbing Code (77 Ill. Adm. Code 890), and the Village of Elmwood Park building department applies those minimum standards locally. Licence guidance comes from the Illinois Department of Public Health, whose online lookup verifies any Illinois plumber.